When a Fresh Coat Feels Like a Fresh Start
Sometimes it’s not about the money, or even the aesthetics. Sometimes you just look at that worn wooden crib and feel like it needs a little love. Maybe it’s a hand-me-down from an older cousin, or the one your older child used, still sturdy but visibly tired. I’ve been there. One of our clients, Anna, had a beautiful oak crib that had belonged to her husband when he was a baby. It held history—but also peeling varnish and a mystery stain she didn’t want to guess at.
If you’re thinking about repainting a wooden crib, you’re not alone. It’s a lovely way to preserve a piece of family life while making sure it feels fresh and clean for your baby. But—this is important—it needs to be done safely. This isn’t just about looks. It’s about choosing materials and steps that won’t compromise your child’s health or sleep.
If your baby is going to spend 12–14 hours a day in their crib, what’s on the rails matters more than what’s on the walls.
Choosing Paint That’s Made for Naps, Not Just Walls
There’s a reason you shouldn’t use leftover wall paint for a baby’s crib—even if the color is perfect. Many paints, especially older or cheaper ones, contain volatile organic compounds (VOCs), which can release toxins for days or even weeks after drying. Babies are especially sensitive to these emissions because their immune and respiratory systems are still developing.
So, what are we looking for instead? Paints that are:
- Water-based (not oil-based)
- Zero-VOC or non-toxic certified
- Safe for toys or labeled “child safe”
Look for phrases like “EN-71-3 certified” or “ASTM F963 compliant”—these are the kinds of technical standards that actually matter when it comes to safety.
And don’t forget finish: go with something that can handle a bit of moisture (babies are drool factories), but not so glossy that it becomes slippery or chips easily. A satin or semi-matte finish is usually the sweet spot.
The Prep Work You Shouldn’t Skip
Let me say this clearly: 90% of the work is in the prep. This isn’t one of those tasks where you can just wipe it down and start painting.
Start by disassembling the crib if possible. It’s not always fun, but it gives you way better access and control. Sand down any old finish, flaking paint, or uneven spots. If the crib has been previously painted, it’s especially important to get a test kit and check for lead, especially if it was painted before 1978. Yes, even if it’s been repainted since then—old layers can lurk.
Don’t assume an old crib is safe just because it’s still standing. Check for hidden hazards before you cover them with a new coat.
Once sanded, wipe the whole crib down with a damp cloth to remove dust. Let it dry completely. Lay down a tarp or newspaper—outside is best, or in a garage with plenty of ventilation. You’ll thank yourself later.
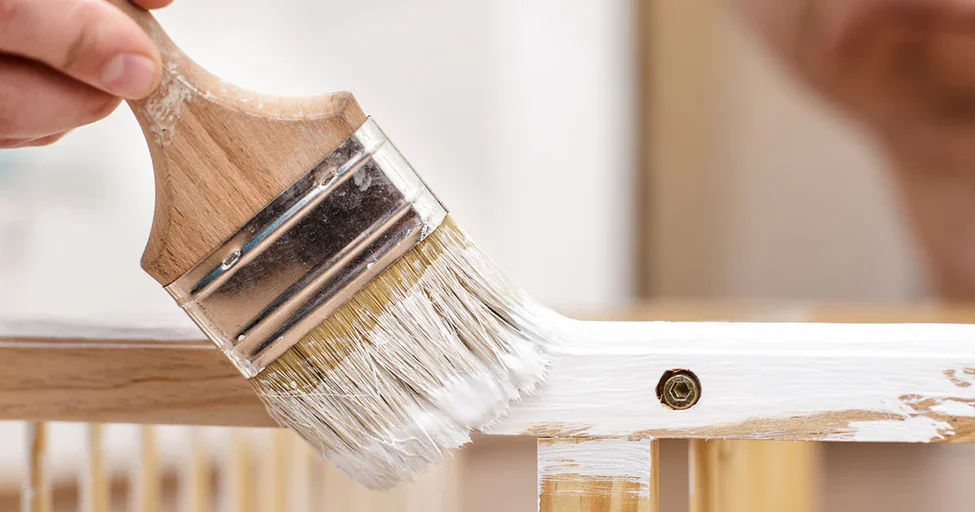
The Painting Process: Calm Hands and a Little Patience
This part is oddly soothing, especially if you approach it like a ritual rather than a rush job. Use a small roller or high-quality brush for even coverage, and plan to apply two thin coats rather than one thick one. This helps the paint adhere properly and minimizes dripping.
Don’t forget the hidden spots—under the rails, inside the slats, behind the backboard. They may not be visible at first glance, but little fingers (and mouths) go everywhere. Take your time with drying between coats. If the paint says 4 hours, wait 8. Humidity, ventilation, and temperature all affect drying time.
Real story: I once got impatient and brought a freshly painted crib into the nursery after “only” six hours. By morning, the room smelled like paint and the rails were tacky. We had to re-sand the whole thing.
So yes, patience is part of the safety protocol here.
Letting It Cure: Don’t Rush the Return
Here’s where most people trip up: they finish the last coat, love how it looks, and bring it in that evening. But even zero-VOC paints need time to fully cure—meaning they’ve stopped off-gassing and hardened completely. That can take anywhere from 3 to 7 days, depending on conditions.
During that time, keep the crib in a ventilated area. Don’t dress it up with sheets or bumpers yet—let every surface breathe. And give it a final wipe-down before reassembling and placing it in the nursery. Babies are sensitive, and so are their little noses.
If your baby is already sleeping in the crib you’re repainting, make a plan for temporary sleeping arrangements. A pack-and-play or co-sleeping setup for a few nights can make a world of difference.
If the air in the room still smells even faintly like paint, it’s not time to move the crib back in. Trust your senses.
What This Process Is Really About
You’re not just painting furniture—you’re creating a place for your baby to rest, to grow, to feel safe. That’s not a small thing. When I helped a client named Sofia repaint a crib from her own childhood, she told me afterward that she felt like she’d built a bridge between generations. Her baby girl sleeps in that crib now, and every time Sofia walks into the room, it feels both old and new.
So if this is something you’re doing out of love—or even just practicality—know that it’s worth taking slowly. Safe sleep isn’t just about what mattress you buy or how many blankets you use. Sometimes, it’s also about the paint on the rails.

